REVIEW · UBUD
3 Hours Wheel Throwing Basic Ceramic Class
Book on Viator →Operated by Local Experiences · Bookable on Viator
Wheel throwing is messier than it looks.
This 3-hour class near Ubud is a hands-on way to learn basic wheel throwing with real coaching, starting from clay prep and moving to hand balance on a spinning wheel. I like that the workshop setup lets you see the tools and machinery used in their daily ceramic work, and that you’ll work with a full batch of clay (up to 3 kg) to practice shapes you actually want. One key drawback to plan for: the firing and glazing for finished pieces can take 1 to 4 weeks, and that final baking step isn’t included in the base price.
The class runs with a simple flow: scale and knead your clay, use the wheel throwing machine, then create multiple pieces and choose your best three to take home (with options for glazing/baking). It’s private for your group and they provide water, an apron, and all materials—so you’re not hunting for supplies or spending your time budgeting tiny extras.
If you’re short on time or expecting your ceramics to come out fully finished the same day, adjust your expectations now. You’ll still leave with your work, but the fully baked/glazed result needs follow-up time.
In This Review
- Key things you’ll notice right away
- Where this Ubud-area wheel throwing class actually happens
- What you get for $50: materials, coaching, and a real chance to practice
- The class flow: clay source, kneading, and scaling your practice
- Wheel throwing 101: centering, balancing, and shaping on the machine
- Hand technique and choosing your best 3 pieces to take home
- The follow-up finishing step: glaze and combustion take time
- Timing, pacing, and group setup for a smoother experience
- Price and logistics: where the $50 makes sense, and where it can add up
- What to do during class to get better results fast
- Communication hiccups: how to protect your day in Bali
- Who should book this wheel throwing basics class
- Should you book the 3 Hours Wheel Throwing Basic Ceramic Class?
- FAQ
- How long is the wheel throwing ceramic class?
- What does the $50 price include?
- Can I take my ceramics home?
- Is glazing and baking included in the class price?
- Do I need my own transportation in Bali?
- Is lunch or snacks provided?
- Where is the meeting point?
Key things you’ll notice right away
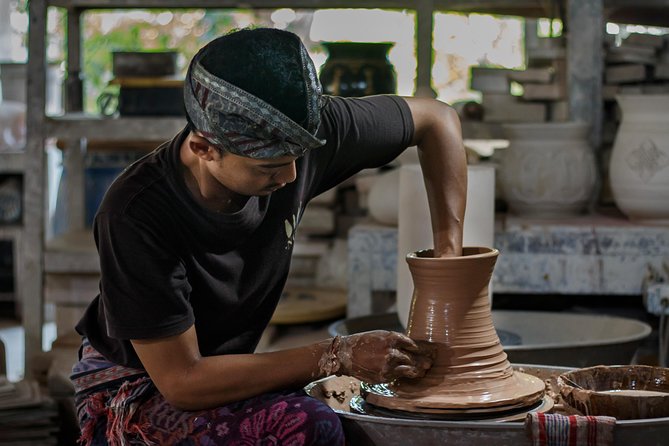
- A true factory-style workshop: you’ll be learning inside their working ceramic space, not a demo room
- Wheel machine + hand technique together: you learn what the wheel does and what your hands must control
- Practice with up to 3 kg of clay: you’re not limited to just one attempt
- Pick your best 3 pieces: focus shifts from quantity to quality when it’s time to choose
- The “finishing” timeline is longer: combustion and glazing can take 1 week to 4 weeks
Where this Ubud-area wheel throwing class actually happens
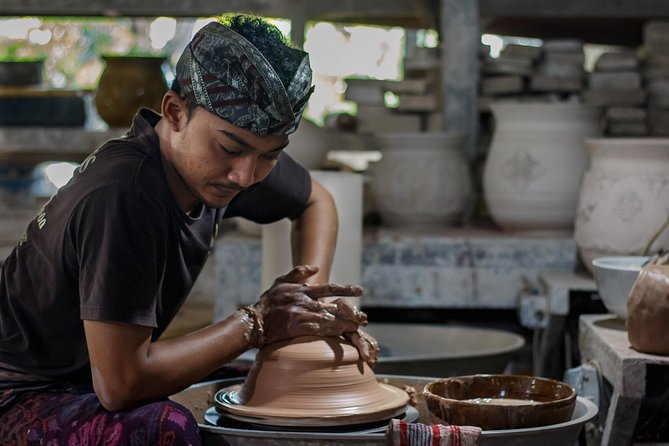
This class is based in the Sukawati/Guwang area (Gianyar Regency), with the start location listed as Jl. Nakula No.511, Guwang, Kec. Sukawati, Kabupaten Gianyar, Bali 80582, Indonesia. It’s close enough to Ubud to make a cultural day trip easy, but different in feel—more workshop than tourist strip.
You start and end back at the same meeting point, which matters if you’re planning your Bali day around other stops. You’ll also have a mobile ticket, and confirmation is received at booking, so bring that info on your phone even if communication gets a little chaotic (more on that later).
There’s no mention of hotel pickup, and private transport isn’t included. So if you’re coming from Ubud center, you’ll want to budget for a driver, Grab-style ride, or your own scooter plan.
You can also read our reviews of more tours and experiences in Ubud


What you get for $50: materials, coaching, and a real chance to practice
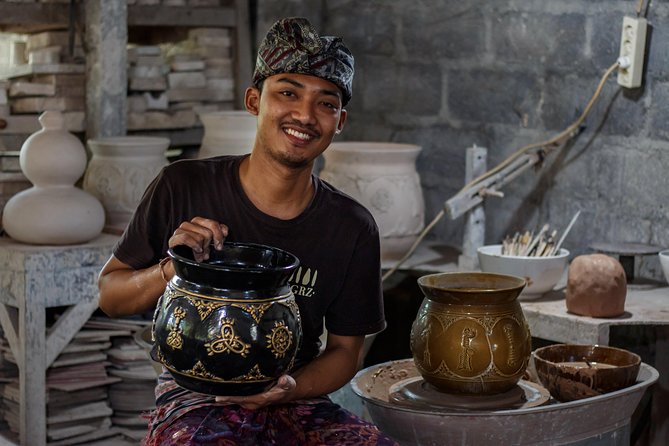
At $50 per person for about 3 hours, the value is mostly in what’s included: clay, wheel time, and the basic materials for coloring/variation if you want that. They also provide bottled water and an apron, which sounds small, but it saves you from the “what do I wear to get clay on me” guessing game.
What’s not included is the combustion process for final products (and fully baked/glazed finishing is also described as an add-on process). That’s the big pricing trap to watch: ceramics can feel like one single experience, but in reality you’re paying for multiple steps—shaping today, firing/glazing later.
So if you care most about the learning and the hands-on satisfaction of making forms, this price makes sense. If you want fully finished, ready-to-use pieces on day one, the base fee may feel incomplete.
The class flow: clay source, kneading, and scaling your practice
This session starts with the unglamorous part that actually makes good pottery possible: scaling and kneading. They’ll guide you through clay prep and explain the basics of the clay source and ceramic types. That matters because wheel throwing isn’t just pushing and spinning—it’s controlling consistency.
They also describe using about 2000 grams (and up to 3 kg in the broader practice setup). That means you’re working with enough clay to try shapes without running out after your first bowl attempt. You can make more than one piece during the session, then later select your top results.
Kneading isn’t just ritual. In practical terms, it helps reduce air pockets and evens out the clay body so it behaves predictably on the wheel. If you’ve ever seen a pot collapse on the wheel, it’s usually a combo of technique and clay consistency, not bad luck.
Wheel throwing 101: centering, balancing, and shaping on the machine
Then comes the main event: using a wheel throwing machine with a hand technique approach. The class includes machine basics and the balancing you need while the wheel spins.
Here’s what to expect in real terms during wheel throwing basics:
- You’ll practice shaping forms by moving your hands in a controlled rhythm.
- You’ll learn how to keep your pressure steady so the walls don’t wobble or thin unevenly.
- You’ll work with the wheel while learning how your hands do the fine work and the machine provides speed/stability.
The teaching style seems geared toward giving you momentum fast. One write-up noted that the teachers did a lot of the work, which can cut both ways. It’s great if you’re worried you’ll fail repeatedly. It may be less great if you want full independence from minute one.
A good middle-ground strategy for you: treat the session like guided reps. You want to understand why your hands are doing something—not just get a finished-looking piece.
Hand technique and choosing your best 3 pieces to take home
A major part of the value is that you don’t have to nail everything perfectly in one try. You’ll experiment during the class and can create multiple ceramic pieces. At the end, you pick your best three to bring home.
That “best 3” rule is practical. It forces you to stop making more attempts and start being honest about what’s structurally solid and what looks good enough to keep. It also helps them manage the next steps (glaze/firing options), since those processes are limited to your selected pieces.
What you take home right away may be your formed ceramics, but if you want the fully glaze and bake process, the follow-up timeline matters. Plan around that, especially if you’re on a tight itinerary and expect a souvenir you can unwrap later.
You can also read our reviews of more tours and experiences in Ubud

The follow-up finishing step: glaze and combustion take time
This is the part most people underestimate with pottery. The class description is clear that combustion and glazing take time—from 1 week up to 4 weeks.
That matches the feedback you’ll hear most consistently: the baking pieces step isn’t included in the class price, even though it’s the step that turns formed clay into durable ceramic. In one reply, the provider also mentioned they would give one piece free of charge for baking, which can soften the cost if you plan to get finishing for at least one item.
How to think about this:
- If you want a fun hands-on workshop experience, today’s shaping is the main payoff.
- If you’re buying pottery as a finished gift (usable or display-ready), ask what “included” means for firing/glazing before you fall in love with a final look.
Also, because the firing/glaze step has a delayed timeline, it affects how you travel with your pieces. You might end up with something you can transport today, then get the final glazed/baked result later. The class info doesn’t spell out pickup/shipping details, so the safest move is to confirm how your finished pieces are handled after processing.
Timing, pacing, and group setup for a smoother experience
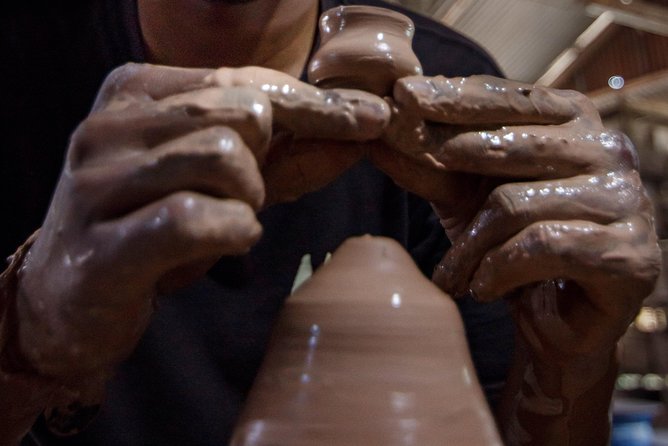
The activity runs about 3 hours. In one account, the class ended about 2 hours early. That tells me pacing can vary depending on the group and how quickly everyone finishes initial shaping and selection.
The tour format is private: only your group participates. For you, that usually means less waiting around and more chance to get corrections on technique. It also helps if you’re traveling with family or friends who move at different speeds.
What to bring is simple: wear clothes you’re willing to clean. Even with aprons, clay is clingy. Also, if you care about getting better results, treat the first part (scaling/kneading) as important. That foundation affects everything that follows.
Price and logistics: where the $50 makes sense, and where it can add up
At $50 per person, you’re paying for:
- all materials and clay (up to 3 kg in their practice setup)
- wheel machine usage
- coloring materials if you want variety
- bottled water and an apron
- guidance through the basics of forming and shaping
- the ability to take home your best 3 creations (with limits tied to later finishing)
Where costs may rise:
- combustion (firing) and glaze for final products are not included
- timing for firing/glaze is 1 to 4 weeks, which may affect how you plan souvenirs
So your value equation should be: Is your main goal learning and making today’s forms? Then you’ll likely feel good about the price. If your main goal is fully finished ceramics you can gift right away, budget extra for firing/glazing—or at least confirm how many pieces will be fully baked.
What to do during class to get better results fast
You’ll get better outcomes if you focus on a few things during those spinning minutes:
1) Centering is everything. Spend your attention there. If the clay isn’t stable, the rest of the shaping turns into damage control.
2) Use steady pressure. Small changes in hand pressure can create thick spots or thin spots quickly.
3) Aim for consistency over perfection. If you rush to make it look like a store bowl, your form may get uneven. A plain, even shape usually lasts longer than a dramatic one with wall flaws.
4) Choose your best 3 thoughtfully. Look for pieces that feel more stable and have more even walls. It’s tempting to pick the most visually exciting ones, but structural quality matters for later finishing.
A light sense of humor helps too. Wheel throwing can make you feel like your hands are suddenly doing interpretive dance. That’s normal.
Communication hiccups: how to protect your day in Bali
One write-up mentioned a communication problem when trying to coordinate via a booking platform, with delayed responses that required finding local help to locate the property. I can’t predict what will happen for you, but I strongly suggest a simple safety plan:
- Save the meeting address and pin it on your map.
- Screenshot your confirmation.
- If messaging doesn’t get answered quickly, try direct contact with the workshop or have your driver help verify the exact location.
This isn’t to scare you—it’s just a practical Bali move. Workshop times can be flexible, and the best outcome is showing up confident about where to go.
Who should book this wheel throwing basics class
This experience is a strong match if you:
- want a hands-on pottery activity instead of a museum day
- are curious about how wheel throwing works beyond watching videos
- enjoy practical skills where you learn by doing
- want to take home multiple pieces (your best 3)
It’s also a good fit for couples or small groups because it’s private, and the feedback loop can be faster.
It’s less ideal if you:
- need fully glazed and baked ceramics on the same day
- dislike anything that requires follow-up (because firing/glazing takes 1 to 4 weeks)
- expect the teachers to do all the work and still have a full DIY experience (teaching style can be more assistive than purely independent)
Should you book the 3 Hours Wheel Throwing Basic Ceramic Class?
Book it if you want a fun, teachable pottery day and you’re okay with the fact that true finishing takes time. The biggest win is the combination of a factory-style workshop, real wheel throwing basics, and plenty of practice clay—plus water and an apron so you can focus on shaping.
Skip or re-check the details if your priority is “finished ceramics now.” Because combustion/glazing isn’t included and processing takes up to 4 weeks, you’ll want to confirm what level of finishing you’ll actually get for the pieces you select.
If you go in with the right expectations, you’ll leave with a clearer feel for how pottery works—and likely a few pieces that look better than you thought you could make in just 3 hours.
FAQ
How long is the wheel throwing ceramic class?
The class is about 3 hours.
What does the $50 price include?
It includes all materials during the class (including clay), wheel throwing machine usage, coloring materials if you want variation, bottled water, and an apron.
Can I take my ceramics home?
Yes. You can bring home your creations, with a limit of the best 3 pieces.
Is glazing and baking included in the class price?
Combustion and glaze processing for final products is not included. You can choose to have them help with fully glazing and baking, and that process takes 1 week up to 4 weeks.
Do I need my own transportation in Bali?
Private transportation isn’t included. You’ll need to arrange how you get to the meeting point and back.
Is lunch or snacks provided?
No lunch or snacks are listed as included.
Where is the meeting point?
The start and end meeting point is listed as Jl. Nakula No.511, Guwang, Kec. Sukawati, Kabupaten Gianyar, Bali 80582, Indonesia.